Canning Technique
Introduction: Mastering the Art of Canning
Canning Technique is a time-honored method of preserving food, allowing us to store fruits, vegetables, and other goods for long periods. By sealing food in jars and applying heat, canning inhibits the growth of microorganisms and maintains the nutritional value of foods. As one of the most efficient Home Canning Methods, this technique enables people to enjoy seasonal produce year-round and reduces food waste. Whether you’re a beginner or an experienced canner, understanding the fundamental principles of Essential Canning Techniques is key to mastering the process.
The evolution of canning techniques has a rich history, dating back to the early 19th century. Initially developed as a way to preserve food for long journeys or during times of scarcity, canning has become a staple in households worldwide. From the early methods of boiling and sealing jars to today’s more advanced Canning Techniques, the practice has continually evolved, integrating new technologies and equipment. Despite these advances, the core principles of canning remain unchanged, emphasizing the importance of hygiene, correct temperatures, and proper sealing.
In this article, we’ll explore three essential tips to help you master Canning Technique and improve your food preservation skills. Whether you’re learning the basics or looking to refine your Advanced Canning Techniques, these tips will guide you in achieving safe, effective, and delicious results every time.
Table of Contents
Section 1: The Basics of Canning:
What is canning?
Canning Technique is a process that involves preserving food by sealing it in airtight containers, typically jars, and then applying heat to destroy harmful bacteria and enzymes. The basic steps of canning include preparing the food, packing it into sterilized jars, and sealing the jars with lids. Heat is then applied to create a vacuum seal, ensuring the food remains preserved for months or even years. This method of food preservation helps to maintain the food’s nutritional value, flavor, and texture. By learning Essential Canning Techniques, beginners can achieve successful results in home canning.
Why is canning an essential method for food preservation?
Canning Technique is an effective way to store food long-term, especially in times when fresh produce is not available. It allows you to enjoy fruits, vegetables, meats, and more throughout the year, without worrying about spoilage or waste. This process locks in the freshness and nutrients, offering a convenient way to preserve seasonal produce. As a vital tool in food preservation, canning also promotes sustainability by reducing food waste. Whether using Home Canning Methods for personal use or large-scale preservation, canning provides a simple yet powerful way to store food safely.
Types of canning techniques
There are several Home Canning Methods that can be used depending on the type of food being preserved. Water bath canning is ideal for high-acid foods such as fruits, jams, and pickles. In this method, jars are submerged in boiling water, and the heat destroys microorganisms. Pressure canning, on the other hand, is necessary for low-acid foods like vegetables, meats, and soups, as it uses high pressure to reach higher temperatures that can kill bacteria. Vacuum sealing is a more modern Canning Technique used for preserving foods in vacuum-sealed bags, typically used for dry foods or for freezing.
Safety measures in canning
When canning at home, it is essential to follow Canning Tips for Beginners to ensure the process is safe and effective. One of the most important safety measures is ensuring that all jars and lids are properly sterilized before use. Also, it’s critical to follow tested recipes to ensure that proper temperatures and times are adhered to. Failing to follow these safety protocols could lead to contamination or spoilage. Always check the seals on jars after canning and discard any jars with broken seals. By taking these precautions, you can ensure safe and long-lasting food preservation through canning.
Section 2: Essential Tip #1 – Choosing the Right Equipment
The importance of using proper canning jars and lids
When mastering Canning Technique, selecting the correct jars and lids is vital for the preservation process. Canning jars come in different sizes, such as pint and quart, and selecting the right size depends on the type of food being preserved. Mason jars are the most commonly used and are specifically designed to withstand the high temperatures required for canning.
The lids should also be properly chosen, metal screw-on lids are standard, but it’s crucial to ensure they seal tightly to maintain the vacuum. Understanding the difference between wide-mouth and regular-mouth jars helps in packing food more efficiently, while the right lids ensure that air doesn’t seep in, preventing spoilage. Proper jar and lid selection is one of the fundamental Essential Canning Techniques that guarantees successful food preservation.
Selecting the right canning equipment
To carry out effective Home Canning Methods, you need the right set of tools. A pressure canner is required for low-acid foods like meats and vegetables because it reaches higher temperatures necessary to kill harmful bacteria. Water bath canners are ideal for high-acid foods such as fruits, jams, and pickles. Other essential tools include a funnel to guide food into jars without spilling, a jar lifter for handling hot jars safely, and a headspace tool to measure the right gap between the food and lid.
Additionally, a canner rack can help prevent jars from direct contact with the bottom of the pot, ensuring an even heat distribution. Using the correct tools for your canning needs helps streamline the process and improve the final outcome, allowing you to apply Advanced Canning Techniques effectively.
Maintaining and caring for your canning equipment
Taking care of your canning equipment is crucial to its longevity and performance. For Canning Tips for Beginners, it’s important to inspect jars and lids before each use. Ensure that jars are free of cracks or chips, and lids should be new and in good condition. After use, clean all tools thoroughly and store them properly to prevent rusting or damage. Pressure canners should be checked for seal integrity and pressure gauges should be calibrated regularly to ensure safety.
Lids must be stored in a cool, dry area to prevent warping, and jar lifters and funnels should be cleaned after every use to avoid food residue build-up. Proper maintenance ensures that your equipment functions properly, allowing you to achieve the best results in your Home Canning Methods and prolonging the lifespan of your tools.
Examples of recommended equipment brands
For reliable canning tools, trusted brands can make a significant difference in your canning experience. For pressure canners, brands like Presto and All-American are highly regarded for their durability and precision. Ball and Kerr are well-known for their high-quality jars and lids, offering products that are perfect for beginners and advanced canners alike. For additional tools like jar lifters, Norpro and Kitchen Craft offer easy-to-use and durable options. Bernardin also provides a complete canning kit that’s ideal for those starting out, including essential tools like funnels, tongs, and headspace measurers. Investing in these trusted brands ensures your tools are reliable, helping you to master both Basic Canning Techniques and Advanced Canning Techniques effectively.
Section 3: Essential Tip #2 – Preparing Food for Canning
Choosing the right food for canning
The success of your Canning Technique largely depends on selecting the right foods for preservation. Fruits, vegetables, and certain meats are ideal candidates for canning. High-acid foods such as tomatoes, berries, and apples are perfect for water bath canning, while low-acid foods like carrots, beans, and meats require pressure canning to ensure safe preservation.
The quality of the food you choose plays a significant role in the final outcome. Fresh, ripe produce ensures that your canned goods will have the best taste, texture, and nutritional value. It’s essential to avoid overripe or damaged foods as these can affect the canning process and result in inferior preservation. By choosing the right foods, you can apply Essential Canning Techniques to achieve a successful outcome.
How to prepare food for canning
Properly preparing food is a crucial step in Home Canning Methods. Before you begin canning, it’s important to wash the food thoroughly to remove any dirt, pesticides, or other contaminants. For fruits and vegetables, cutting them into uniform pieces ensures even cooking and consistent results. Blanching is another important step, especially for vegetables. This involves briefly boiling the vegetables and then plunging them into ice water to preserve color, texture, and nutrients. Some foods, like jams and pickles, require cooking before canning, while others can be canned raw. By following these preparation steps, you ensure that your food is clean, safe, and ready to be preserved using the correct Canning Tips for Beginners.
Understanding the acidity of food for safe canning
The acidity of food is a key factor in determining which canning method to use. High-acid foods, such as fruits, tomatoes, and vinegars, can safely be preserved using water bath canning, as their acidity prevents the growth of harmful bacteria. Low-acid foods, such as meats, poultry, and most vegetables, must be processed using a pressure canner to reach a high enough temperature to kill bacteria and prevent spoilage. Understanding the pH levels of different foods is essential to ensure safety during the canning process. Foods with a pH lower than 4.6 are acidic enough for water bath canning, while those with a higher pH require pressure canning. This knowledge is fundamental to mastering Advanced Canning Techniques and preserving food safely.
Tips for ensuring the best flavor and texture
Proper preparation techniques directly influence the flavor and texture of your canned foods. To preserve the best flavor, it’s important to handle food gently during preparation, as bruising or over-mashing can impact taste. Blanching vegetables before canning helps to lock in flavor while maintaining a firm texture. For fruits, some recipes recommend adding a bit of lemon juice or ascorbic acid to preserve color and flavor. Additionally, ensuring that your food is packed properly in jars, without air gaps, helps maintain a better texture during storage. By following the correct preparation steps, you can ensure that your preserved foods maintain their original flavor and texture, showcasing the importance of thorough preparation in successful Canning Techniques.
Section 4: Essential Tip #3 – Mastering the Canning Process
Water bath canning vs. pressure canning
Understanding the difference between water bath canning and pressure canning is essential in mastering the Canning Technique. Water bath canning is suitable for high-acid foods like fruits, jams, jellies, and pickles. The food is submerged in boiling water for a set period to destroy microorganisms. In contrast, pressure canning is used for low-acid foods, such as meats, poultry, and most vegetables, which require higher temperatures to destroy bacteria that could cause spoilage.
Pressure canning uses a sealed, pressurized environment to raise the temperature above the boiling point of water, ensuring the food is processed at a temperature high enough to preserve it safely. Choosing the right method depends on the food’s acidity level, which is a critical aspect of Home Canning Methods. Mastering when and how to use each method is crucial for successful preservation and is one of the Essential Canning Techniques.
Timing and temperature control
Precise timing and temperature control are at the heart of the canning process. Too much or too little time can result in either under-processed or overcooked food. For water bath canning, the water must maintain a consistent temperature (typically 212°F) throughout the process, while pressure canning requires reaching a higher temperature (usually between 240°F to 250°F) to safely preserve low-acid foods. The temperature must be monitored closely throughout the process, and the timing is crucial for ensuring that the food is adequately processed and safe for storage. Following the recipe guidelines carefully for time and temperature is critical for avoiding spoilage. Achieving proper temperature control is one of the most vital Canning Tips for Beginners and ensures long-term preservation success.
Sealing jars correctly
Sealing your jars properly is one of the most important steps in Canning Techniques. After filling the jars with prepared food, wipe the rims of the jars to remove any residue or food particles that could interfere with the seal. Next, place the lids on the jars and screw on the rings until they are fingertip tight, not too loose or too tight. Over-tightening the rings can prevent air from escaping, while under-tightening can prevent a vacuum seal from forming. Proper sealing ensures that the jars are sealed tightly enough to prevent air and bacteria from entering, which could cause spoilage.
This step is critical in ensuring your preserved food remains safe and delicious for months or even years. Following this step meticulously is part of mastering the Home Canning Methods and essential for long-term storage.
Checking for a vacuum seal
Once the canning process is complete, it’s crucial to check for a vacuum seal to ensure that the jars are properly sealed and the food is safe for storage. The best way to check is by pressing down in the center of the lid; if it doesn’t pop back, the jar has sealed correctly. You can also remove the screw band from the jar and gently lift the jar by the lid to check for a strong vacuum seal.
If the lid pops or moves, the jar did not seal properly, and the food inside may not be safe to store. If any jars do not seal, they should be refrigerated and consumed quickly or reprocessed to achieve a proper seal. Testing for a vacuum seal is one of the most critical steps in Advanced Canning Techniques to ensure food safety and long-term storage success.
Section 5: Advanced Canning Techniques
Using canning for preserving meats and low-acid foods
Preserving meats and low-acid foods such as vegetables, poultry, and seafood requires a more advanced approach to Canning Techniques, as these foods must be processed at higher temperatures to destroy harmful bacteria. Pressure canning is the only safe method for preserving these types of foods, as it uses high heat and pressure to kill bacteria that could cause botulism.
Essential Canning Techniques for meats and low-acid foods include selecting the correct jar sizes, ensuring proper headspace, and maintaining the right processing time and pressure. It’s vital to follow safe, tested recipes to avoid foodborne illnesses. Mastering this Advanced Canning Technique ensures that meats and vegetables are preserved correctly and safely, providing long-term storage options for a variety of foods.
Blending traditional and modern canning techniques
Incorporating modern tools into traditional canning methods can enhance efficiency and preserve food more safely. While traditional methods like water bath canning and pressure canning are still reliable, today’s canners benefit from modern innovations such as electric pressure canners, digital thermometers, and vacuum sealing systems. These advancements help with temperature control, reduce the risk of errors, and increase consistency in the canning process.
Combining Home Canning Methods with new technology doesn’t replace the importance of time-tested practices, it complements them, allowing for both convenience and safety. By blending these tools with traditional techniques, you can maintain the integrity of the process while improving results. Understanding how to merge the old and new methods is a hallmark of mastering Advanced Canning Techniques.
Troubleshooting common canning problems
Even experienced canners can run into challenges during the process. Common canning issues include jar sealing failures, discoloration, or air bubbles trapped in jars. Jar sealing failure often occurs when there is residue on the lid’s rim or the jar is not filled to the appropriate level. To avoid this, ensure that rims are clean, jars are properly sterilized, and lids are in good condition before sealing.
Canning Tips for Beginners emphasize the importance of correct jar placement in the canner and maintaining consistent temperature and pressure throughout the process. If jars don’t seal, they should be refrigerated and eaten within a few days, or reprocessed to ensure safety. Proper troubleshooting is an essential skill when perfecting Advanced Canning Techniques, as it helps ensure safe, long-term preservation.
Innovative recipes for advanced canning projects
Once you’ve mastered the basics, exploring more complex canning projects can be exciting and rewarding. Advanced Canning Techniques include making specialty items like pickles, sauces, jams, and relishes that require a deeper understanding of the canning process. For instance, creating fermented pickles or salsas involves a precise balance of acidity, salt, and spices, while tomato sauces may require added attention to the type of tomatoes used and the cooking time.
These recipes often demand careful preparation and monitoring, making them ideal for experienced canners looking to expand their skills. By experimenting with more complex recipes, you can enhance your home-preserving abilities and build a diverse pantry of preserved foods.
Section 6: Canning Storage and Shelf Life
How to store canned food properly
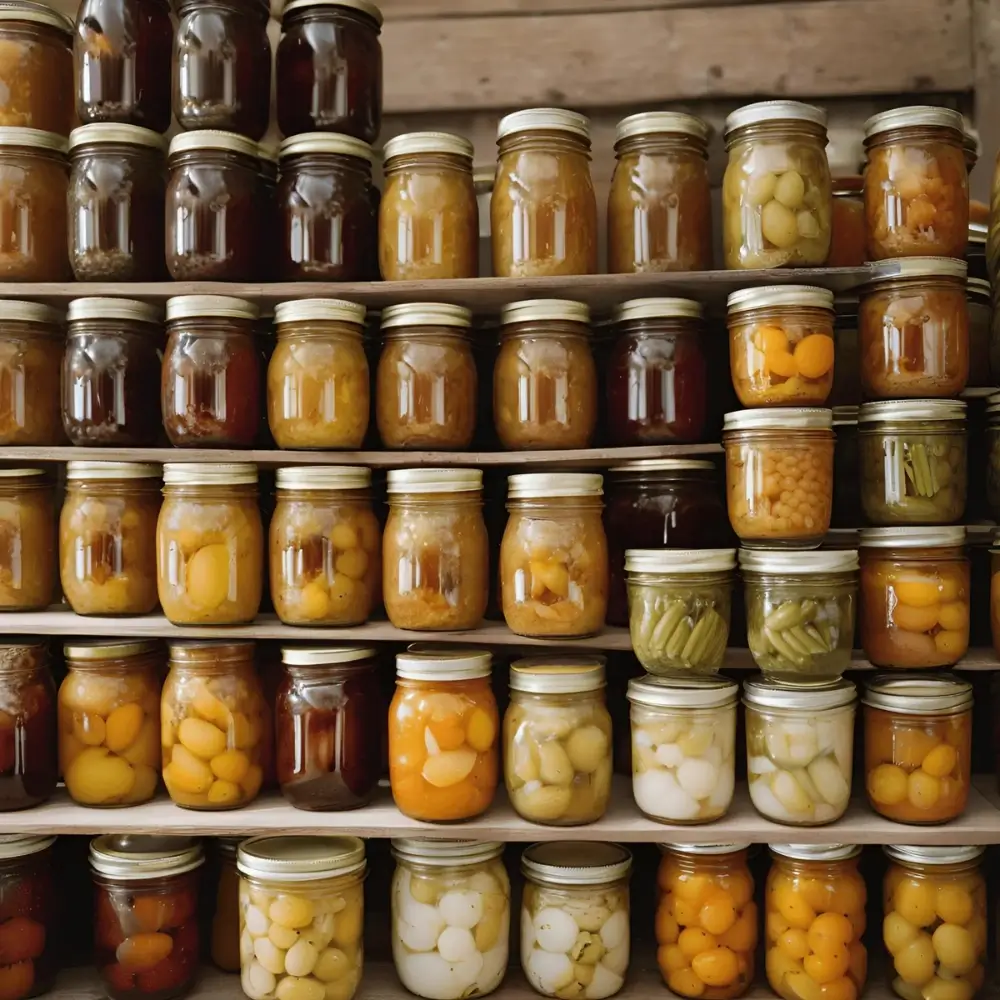
Proper storage is essential to maintaining the quality and safety of home-canned goods. After canning, jars should be stored in a cool, dark place with a consistent temperature of around 50–70°F (10–21°C). Humidity should be low to prevent rusting of the lids and degradation of seals. Avoid storing jars in areas subject to extreme temperatures or direct sunlight, as these conditions can compromise the integrity of the seal and spoil the contents. By adhering to these Essential Canning Techniques, you ensure the longevity and safety of your preserved foods. Additionally, proper storage prevents the growth of microorganisms, keeping your food safe for consumption.
The shelf life of home-canned goods
The shelf life of home-canned foods varies depending on the type of food and the canning method used. High-acid foods like fruits, tomatoes, and jams typically last for 12 to 18 months, while low-acid foods like vegetables and meats may last up to 3-5 years when properly pressure canned. Always check for signs of spoilage, such as bulging lids, off smells, or unusual discoloration, which indicate a failure of the seal or contamination. Practicing Canning Tips for Beginners is essential to ensure your preserved foods are stored properly and remain safe to eat. Regularly checking your jars and following proper sealing techniques will help maintain the quality of your canned goods.
Tips for labeling and organizing canned goods
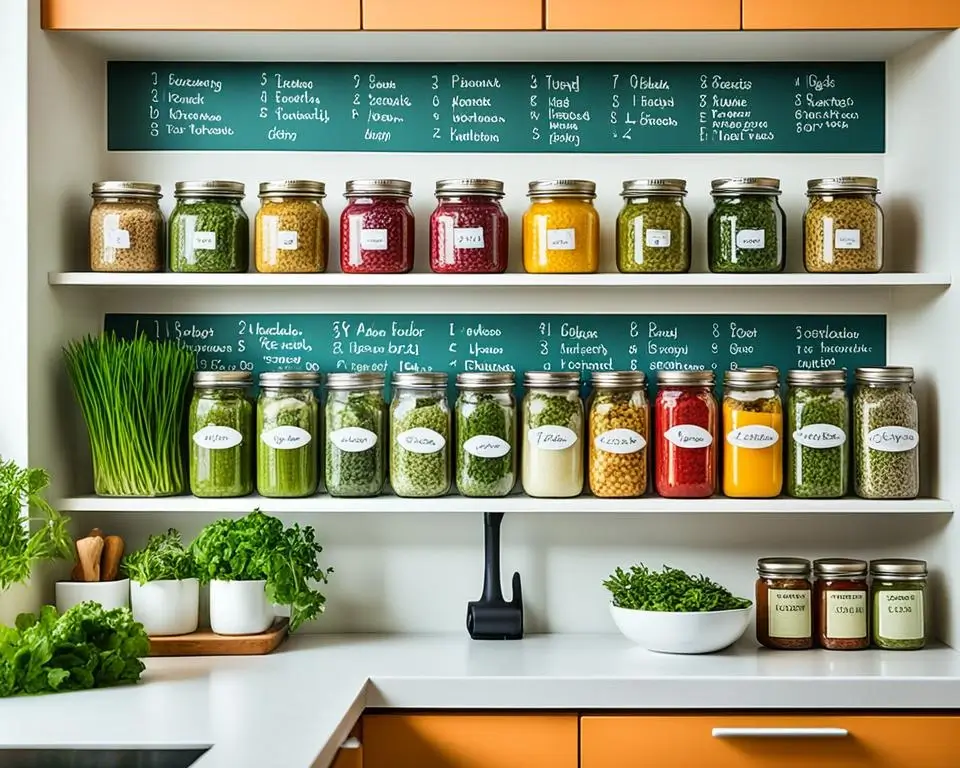
Proper labeling and organization of your canned goods are crucial for maintaining an efficient home canning system. Each jar should be labeled with the contents, canning date, and any specific details (e.g., type of recipe or processing time). This allows you to track the shelf life and ensure that older items are used first. Organize your canned goods by type and expiration date, and store them in a cool, dark area to preserve their flavor and nutritional value. Maintaining clear records of what you have canned, and when it was processed, is one of the most effective Home Canning Methods to prevent waste and ensure that you enjoy fresh, preserved food throughout the year.
Section 7: Common Canning Mistakes and How to Avoid Them
Overfilling jars: Why it’s essential to leave the proper headspace
One of the most common mistakes in canning is overfilling jars, which can prevent a proper seal and lead to spoilage. It’s essential to leave the appropriate headspace, typically 1/4 to 1/2 inch, to allow for expansion during the canning process. Overfilling jars not only increases the risk of sealing failure but also makes it difficult for heat to properly penetrate the food, which could result in under-processing. By following Essential Canning Techniques, such as ensuring proper headspace, you can ensure that your jars seal effectively and your food stays safe for long-term storage.
Skipping the sterilization process: The importance of sterilizing jars and equipment
Sterilizing jars and equipment before use is a critical step in the canning process. If jars and lids are not properly sterilized, harmful bacteria and microorganisms could contaminate your food, even if the canning process itself is done correctly. To avoid this mistake, always boil jars and lids or place them in a hot oven to sterilize before canning. This step is especially crucial for low-acid foods, which are more prone to bacterial growth. Implementing Canning Tips for Beginners ensures that sterilization is always part of your preparation process, reducing the risk of contamination and preserving the quality of your food.
Ignoring the pH levels of food: Why pH plays a crucial role in safe canning
pH levels are a critical factor in safe canning, as they determine whether foods need to be processed in a water bath or pressure canner. High-acid foods, such as fruits and tomatoes, can be safely processed using water bath canning, while low-acid foods, like vegetables and meats, require the higher temperatures provided by pressure canning. Ignoring the pH levels can lead to under-processing, which increases the risk of bacterial growth and spoilage. By carefully considering the acidity of your food and using the appropriate canning method, you can avoid safety risks and ensure your preserved food remains safe for consumption.
Not following proper sealing methods
Failing to follow the correct sealing methods is a common mistake that can lead to spoilage or contamination in canned foods. After processing, it’s essential to ensure that each jar has a proper vacuum seal. This can be done by checking for a concave lid once the jar has cooled, indicating a successful seal. If the lid pops back when pressed, it means the jar did not seal properly and should be reprocessed or refrigerated. Always inspect seals before storing jars to prevent spoilage. Mastering Canning Techniques ensures that sealing methods are consistently followed, reducing the risk of food waste or foodborne illness.
Conclusion: Mastering the Art of Canning for Long-Term Food Preservation
In conclusion, canning techniques are a valuable skill that every home cook can master to ensure their food is preserved safely and effectively. By following the essential canning tips, such as choosing the right equipment, preparing your food properly, and mastering the canning process itself, you can confidently preserve a wide variety of foods for long-term storage. Understanding both the basic and advanced canning techniques allows you to refine your preservation methods, creating delicious, shelf-stable meals that can be enjoyed year-round.
Remember, canning is not just about food storage; it’s about ensuring that you’re preserving the highest quality and flavor while maintaining safety and hygiene throughout the process. Whether you are a beginner learning the ropes or an experienced canner exploring more intricate methods, the journey to becoming a canning expert is both rewarding and practical.
As you continue to explore home canning methods, take the time to experiment, refine your techniques, and embrace the beauty of preserving nature’s bounty. With the right knowledge and attention to detail, you’ll create jars of joy that will nourish your family and friends for months or even years to come. So, gather your supplies, trust in the process, and start preserving today with confidence. Happy canning.
FAQ
What are the 5 methods of Canning Technique?
The five primary canning techniques include water bath canning, pressure canning, vacuum sealing, freezer canning, and steam canning. Each method is tailored to specific foods, with essential canning techniques determining which is safest and most effective for preserving food.
What is canning in cooking?
Canning technique is a preservation method where food is sealed in jars or containers and heated to destroy bacteria, yeasts, and molds. This process helps preserve food for long periods, ensuring flavor and nutrients are maintained. Proper home canning methods are vital for safe, long-term storage.
What are the 5 stages of the canning process?
The five stages of canning technique include preparing the food, sterilizing jars and lids, packing food into jars, sealing the jars, and processing them in a canner. Essential canning techniques like these ensure that food is preserved safely, avoiding contamination and spoilage.
What foods cannot be canned?
Certain foods, such as dairy products, eggs, and foods with low acidity, cannot be safely canned using traditional methods. These foods require advanced canning techniques like pressure canning to prevent spoilage. Always research the proper canning method for each type of food.
What is the new method of canning?
The new method of canning technique involves modern tools like sous-vide canning or the use of advanced pressure canners. These methods combine traditional home canning methods with technology to enhance food safety, preserving food more efficiently and for longer periods.
What method is not recommended for canning?
Open-kettle canning, where food is cooked in an open pot and then poured into jars without sealing, is not recommended. This method does not ensure proper sterilization and sealing, which is essential for safe canning techniques and long-term food preservation.
What are the three types of canning?
The three primary canning techniques are water bath canning, pressure canning, and vacuum sealing. Each method is suited to different foods, with canning tips for beginners helping you choose the right one to preserve food safely.
