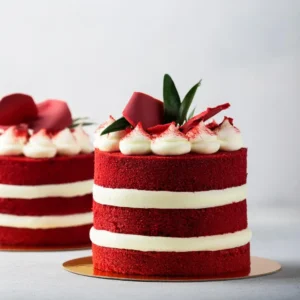
Red Velvet Cake Recipe
Indulge in the irresistible beauty and flavor of a homemade red velvet cake! With its rich, moist layers and a perfect balance of cocoa and vanilla, this cake is a true showstopper. Topped with creamy, tangy cream cheese frosting, it’s the ultimate treat for any celebration. Whether you're a baking beginner or a seasoned pro, this easy-to-follow recipe ensures a perfect red velvet cake every time. Download the recipe now and create a stunning, delicious red velvet cake that everyone will love!
Ingredients
- 250 grams All-purpose flour
- 300 grams Granulated sugar
- 50 grams Unsweetened cocoa powder
- 1 teaspoon Baking soda
- 1 teaspoon Salt
- 1 cup Vegetable oil
- 1 cup Buttermilk (room temperature)
- 2 Large eggs (room temperature)
- 2 tablespoons Red food coloring
- 1 teaspoon Vanilla extract
- 1 teaspoon White vinegar
- 225 grams Cream cheese (softened) For the Cream Cheese Frosting
- 115 grams Unsalted butter (softened) For the Cream Cheese Frosting
- 300 grams Powdered sugar For the Cream Cheese Frosting
- 1 teaspoon Vanilla extract For the Cream Cheese Frosting
Instructions
- Preheat Your Oven and Grease the Cake Pans: Begin by preheating your oven to 175°C (350°F). This ensures that the oven reaches the right temperature before you place your cake pans inside. While the oven is heating, prepare your two 9-inch round cake pans by greasing them with butter or non-stick spray. If you want to ensure the cakes come out easily after baking, you can also line the bottoms of the pans with parchment paper. This step prevents the cake from sticking to the pan, ensuring a smooth release when it’s time to turn them out.
- Mix the Dry Ingredients: In a large mixing bowl, combine your dry ingredients: all-purpose flour, unsweetened cocoa powder, baking soda, and salt. Use a whisk or spoon to mix them together thoroughly. This ensures that the cocoa powder is evenly distributed, and that the baking soda and salt are well incorporated into the flour. This step is important because it helps the cake rise evenly while ensuring no clumps of cocoa or baking soda in the batter.
- Cream Together Sugar and Butter: In another mixing bowl, place the granulated sugar and softened butter. Use an electric mixer (or a whisk if you prefer) to beat them together until the mixture becomes light, fluffy, and pale in color. This process is called “creaming,” and it helps to incorporate air into the batter, which results in a light and tender cake texture. Be sure to scrape down the sides of the bowl occasionally to make sure all the butter and sugar are properly mixed.
- Add the Eggs, Buttermilk, Oil, Food Coloring, and Vanilla: Next, add the eggs one at a time, beating well after each addition. This ensures the eggs are fully incorporated into the butter and sugar mixture. After adding the eggs, mix in the buttermilk, vegetable oil, red food coloring, and vanilla extract. The buttermilk and oil contribute to the cake’s moist texture, while the food coloring gives the cake its signature red hue. Continue to mix the ingredients until they are well combined.
- Combine the Wet and Dry Ingredients: Gradually add the dry ingredients to the wet mixture, a little at a time, mixing gently after each addition. Use a spatula or a spoon to stir the batter, being careful not to overmix. Overmixing can result in a dense cake. Once the dry ingredients are fully incorporated and the batter is smooth, stop mixing. You want the cake batter to be just combined, with no visible streaks of flour or cocoa powder.
- Divide the Batter Between the Pans: Now it’s time to divide the batter between the two prepared 9-inch round cake pans. Use a spatula to spread the batter evenly in each pan, making sure that the surface is level. This will help the cakes bake evenly. If you’re unsure, you can use a kitchen scale to ensure that the batter is divided equally between the pans.
- Bake the Cake: Place the pans in the preheated oven and bake for 25-30 minutes. The exact baking time may vary depending on your oven, so start checking the cakes around 25 minutes. To test if the cakes are done, insert a toothpick into the center of each cake. If it comes out clean or with only a few crumbs attached, the cakes are ready. If the toothpick comes out with wet batter, continue baking for a few more minutes.
- Cool the Cakes: Once the cakes are done, remove them from the oven and let them cool in the pans for about 10 minutes. This allows the cakes to set and makes it easier to remove them from the pans without breaking. After 10 minutes, run a knife around the edges of the pans to loosen the cakes. Then, carefully transfer the cakes onto a cooling rack to cool completely. Allow the cakes to cool for at least 30 minutes before frosting. This step is crucial to prevent the frosting from melting when applied to the warm cake.